When it comes to upgrading the aesthetics of your home, removing old carpet is often one of the first steps. However, if you have a beautiful hardwood, tile, or laminate floor underneath, ensuring that you remove the carpet carefully is essential to avoid damage. In this guide, we’ll walk you through each step of safely removing old carpet to protect the floor underneath, providing you with detailed tips to make the process smooth and efficient.
Preparation: Gathering Essential Tools and Materials
Before you start, it’s crucial to gather all the necessary tools and materials to ensure a smooth and safe carpet removal process. Here are the essentials:
- Utility knife
- Pliers
- Pry bar
- Knee pads
- Work gloves
- Dust mask
- Duct tape
- Pliers
- Floor scraper
Step 1: Clear the Room
Start by removing all furniture, decorations, and appliances from the room. This will give you full access to the carpet and help you avoid potential hazards. Clearing the space also prevents dust and debris from settling on items during the removal process.
Step 2: Remove Baseboards and Molding
To safely remove the carpet without damaging the floor, first, take off any baseboards or molding that are covering the edges of the carpet. Use a pry bar to carefully loosen the baseboards, taking care not to damage the wall or molding itself. Place the removed baseboards in a safe spot if you plan to reinstall them after the carpet removal.
Step 3: Cutting and Removing the Carpet
- Divide the Carpet into Sections: Use a utility knife to cut the carpet into manageable sections. Begin by cutting the carpet down the middle and then further subdivide it into smaller strips.
- Peel Back the Carpet: Starting at one corner, pull the carpet back with the pliers. Carpet is usually attached to the floor using tack strips along the edges, so use caution and gradually pull back the carpet.
- Roll Up the Carpet: As you peel back each section, roll it up tightly and secure it with duct tape. This will make it easier to transport and dispose of later.
Step 4: Removing the Carpet Padding
Underneath the carpet, you will likely find a layer of carpet padding. Here’s how to safely remove it:
- Cut the Padding into Strips: Similar to the carpet, use a utility knife to cut the padding into manageable strips.
- Detach the Padding: Carpet padding is often stapled down, so you may need to use pliers to remove staples from the floor. Be gentle to avoid scratching or denting the floor underneath.
- Roll and Dispose of the Padding: Roll up each strip of padding and secure it with duct tape. This helps keep the padding from unraveling and makes it easier to carry.
Step 5: Remove Tack Strips Carefully
Tack strips are nailed around the edges of the floor and are designed to keep the carpet in place. To safely remove these:
- Pry Up the Tack Strips: Use a pry bar to carefully lift the tack strips. Insert the pry bar under the strip near the nails and gently lift it away from the floor.
- Dispose of Tack Strips Safely: Tack strips have sharp nails, so handle them with gloves and dispose of them in a way that reduces the risk of injury.
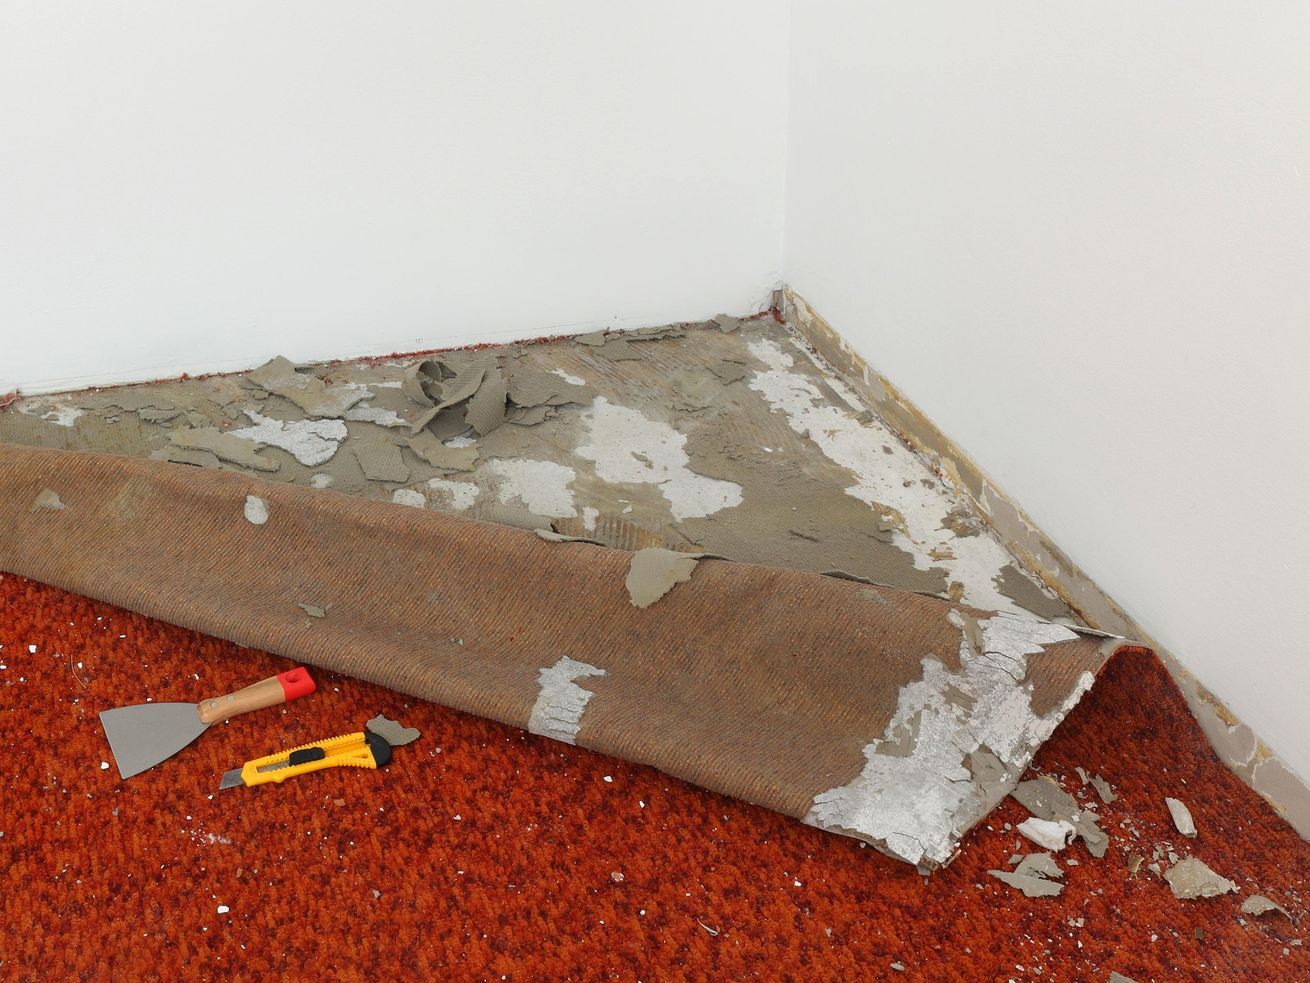
Step 6: Removing Adhesive Residue and Staples
After removing the carpet and padding, you may notice adhesive residue or leftover staples:
- Adhesive Residue: If there is adhesive residue on the floor, use a floor scraper to gently remove it. For particularly stubborn spots, a bit of warm soapy water or adhesive remover can help soften the residue for easier removal.
- Staples: Use pliers to pull up any remaining staples. Make sure you’ve removed all staples before proceeding, as leftover staples can damage the flooring if you’re planning on laying new carpet or flooring over it.
Step 7: Cleaning and Inspecting the Floor
With the old carpet fully removed, now is the time to thoroughly clean and inspect your floor:
- Vacuum and Sweep the Floor: Remove any dust, debris, or small carpet fibers left behind. This will make the inspection process easier and help you spot any potential damage or needed repairs.
- Inspect for Damage: Look for any scratches, dents, or other damage that may have occurred during the carpet removal process. If you find any issues, now is the time to address them, whether through DIY repairs or by hiring a professional.
- Wipe Down the Floor: Using a slightly damp mop or cloth, wipe down the floor to remove any remaining dust or adhesive residue.
Safety Tips for Carpet Removal
- Wear protective gear: Always wear gloves, knee pads, and a dust mask to protect yourself from allergens and sharp tack strips.
- Be cautious of allergens: Old carpets can contain dust, mold, and allergens, so take extra precautions if you have allergies.
- Dispose of waste responsibly: Contact your local waste management service for guidance on disposing of old carpet, padding, and tack strips, as some areas have specific requirements for carpet disposal.
By following these steps and using the right tools, you can safely remove old carpet without damaging the underlying floor, allowing you to prepare your space for a new flooring installation or simply enjoy the restored beauty of your existing floor.