
One of the easiest yet most powerful approaches to revitalize a project or place is painting. Using the incorrect tools or techniques, however, can produce less-than-perfect outcomes. Though not everyone is aware of the subtleties of using it properly, the chip paint brush is among the most often used instruments in the painting industry. Five typical errors individuals make while using a chip paintbrush will be discussed in this article together with ways to prevent them. We also will introduce the epoxy glide roller cover, another instrument you would like to have for your painting operations.

Choosing the Wrong Size Chip Paint Brush
Many people make the error of choosing a size chip paintbrush inappropriate for their project. Usually measuring between 1 inch and 4 inches wide, chip paint brushes exist in several sizes. Using a brush either too small or too large might cause poor control and unequal coverage.
For little, detailed tasks like cutting or detailing, a 1-inch brush is perfect. A 3- or 4-inch brush will provide the best coverage for more general strokes and greater areas. Before beginning, spend some time evaluating your project and selecting the proper brush size.
Not Prepping the Surface Properly
Surface preparation is one of the most important stages in painting; many people go wrong here. The paint won’t stick effectively and you will get an inconsistent finish regardless of your technique if the surface isn’t clean, smooth, and dry.
Make sure the surface is clean of debris, grease, and past paint before applying a chip paint brush. Sand any sharp edges and use a clean, moist towel to wipe off the surface. This easy procedure will guarantee that the paint adheres properly and flows naturally, therefore producing professional-looking effects.
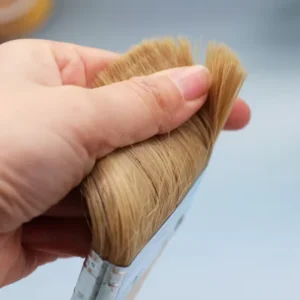
Overloading the Chip Paint Brush with Paint
One often makes the error of dipping too much of the chip paintbrush into the paint. Overloading the brush usually results in drips, runs, and an uneven application, even if it seems that the more paint on the brush, the faster the task will get done.
Dip just approximately one-third of the brush’s bristles into the paint to avoid this. Lightly tapping the brush against the paint can’s edge can help you turn off any extra colour. This technique guarantees a controlled, smooth application and lowers the possibility of undesired splatters and drips.
Using the Wrong Brush for the Type of Paint
Usually composed of natural bristles, chip paint brushes are most suited for varnishes, stains, and oil-based paints. When using a chip paint brush with water-based paints—such as latex—the bristles may absorb too much water and lose their shape, therefore producing a poor finish.
If you use water-based paints, choose a synthetic bristle brush or take some thought about using a foam brush. Chip paint brushes will work nicely for oil-based crafts. Furthermore, you could wish to change to a tool like the epoxy glide roller cover, which is meant for an even and seamless application, for bigger tasks or for those needing a smoother finish.

Not Cleaning the Chip Paint Brush Properly
Ignoring to wash the chip paint brush after usage is one of the most often made blunders. Paint left on the brush will set and render the brush useless for next projects. Ignoring thorough cleaning of the brush could shorten its lifetime and performance even if you intend to use the same one the next day.
For oil-based paints, run your brush under mineral spirits or a paint thinner. Just rinse the brush with soap and warm water for water-based paints. Cleaning; then, reshape the bristles and hang the brush to dry. Over time, a few minutes spent correctly cleaning and caring for your chip paintbrush will save you money and time.
Using a Chip Paint Brush for Large, Flat Surfaces
Although the chip paint brush is flexible, it is not the best instrument for covering flat surfaces like ceilings or walls. Smaller, more detailed work calls for a chip paintbrush, so utilizing it for bigger projects could result in an uneven finish and weary hands from constant use.
For big surfaces, think about utilizing a roller—more especially, an epoxy glide roller cover—which is meant for uniform, even application over wide areas. Reducing the time and work required to finish your job, the epoxy glide roller cover lets you swiftly and evenly cover big surfaces.
Forgetting to Tape Off Edges and Trim
Ignoring correct tape-off of edges and trim while painting is one of the most avoidable errors. Painting over areas that should remain clean without painter’s tape runs the danger of producing an untidy, unprofessional finish.
Always tape off the areas where you don’t want paint to travel when trimming or cutting in around the edges with a chip paint brush. This easy step will guarantee that your finished work has neat, clean lines and help the process run more quickly.
Conclusion
Although the chip paint brush is a dependable instrument for small to medium jobs, like any tool it needs correct use and care. You may get better results and extend the life of your brush by avoiding six typical mistakes—choosing the wrong brush size, disregarding surface preparation, overloading the brush, using it with the wrong type of paint, and failing to clean it correctly.
If working with epoxy-based paints or on bigger areas, think about using an epoxy glide roller cover to create a professional-looking finish. Any painting project will benefit from your ability to use the correct tools for every chore and keep them in good condition.