Proper insulation is vital for maintaining energy efficiency and comfort in any building. Fiberglass batt insulation is one of the most popular choices due to its effectiveness and ease of installation. This guide will walk you through the process of installing fiberglass batt insulation correctly, ensuring your home or building stays comfortable year-round.
Understanding Fiberglass Batt Insulation
Fiberglass batt insulation consists of pre-cut panels made from fiberglass, designed to fit between the framing members of walls, floors, and ceilings. It is available in various thicknesses and R-values, allowing homeowners to choose the level of insulation that suits their needs.
Benefits of Fiberglass Batt Insulation
- Energy Efficiency: Fiberglass batt insulation helps reduce heat transfer, keeping homes warm in winter and cool in summer. This energy efficiency can lead to lower utility bills.
- Cost-Effective: This insulation type is relatively affordable and can be installed by homeowners without professional help, saving on installation costs.
- Fire Resistance: Fiberglass is non-combustible, adding an extra layer of safety to your home.
- Soundproofing: It can also help reduce noise between rooms, creating a more peaceful living environment.
Preparing for Installation
Before starting the installation process, you need to gather the necessary materials and tools. Here’s a simple checklist:
Materials Needed
- Fiberglass batt insulation (ensure it fits your framing)
- Vapor barrier (if required)
- Safety gear (gloves, goggles, and mask)
Tools Required
- Utility knife
- Measuring tape
- Straight edge
- Stapler (if using a vapor barrier)
- Ruler or square
Safety First
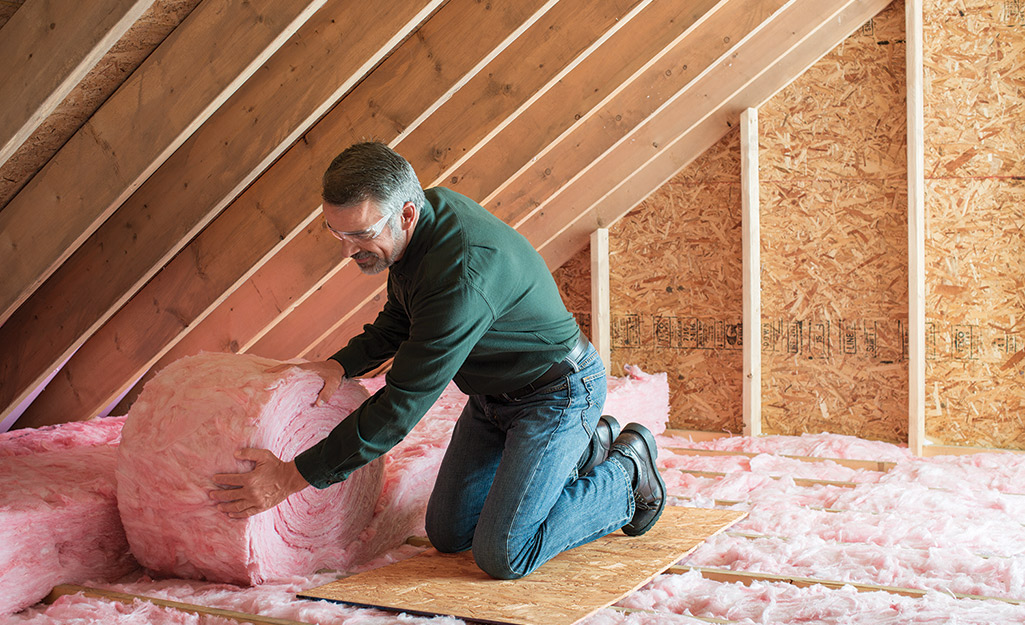
When working with fiberglass batt insulation, it’s important to wear protective gear. The fibers can irritate your skin, eyes, and lungs, so always wear gloves, safety glasses, and a mask during installation.
Steps for Installing Fiberglass Batt Insulation
Follow these steps for a successful installation of fiberglass batt insulation:
Step 1: Measure Your Space
Start by measuring the area where you will install the insulation. Accurate measurements will help you purchase the right amount of insulation and ensure a proper fit.
Step 2: Cut the Insulation
Using your utility knife and straight edge, cut the fiberglass batt insulation to fit between the studs. It’s important to cut the insulation slightly wider than the space between the studs for a snug fit. This will prevent air leaks and ensure optimal performance.
Step 3: Install the Insulation
Carefully place the cut batt insulation into the cavity between the studs. Make sure to position it with the facing (the vapor barrier) towards the living space if your local building codes require it.
Step 4: Secure the Insulation
Use a staple gun to secure the insulation in place if necessary. This step is particularly important if you are installing insulation in ceilings or floors. Ensure that the insulation fits snugly against the framing to avoid gaps.
Step 5: Install the Vapor Barrier
If your area requires a vapor barrier, unroll it over the insulation. Secure the vapor barrier in place using staples or tape. This barrier prevents moisture from penetrating the insulation, which can lead to mold growth.
Step 6: Check for Gaps
Once you’ve installed the insulation, check for any gaps or areas where air can escape. Filling these gaps will improve your home’s energy efficiency.
Step 7: Finish Up
After securing the insulation, you can proceed with drywall installation or any other finish work you have planned.
Common Mistakes to Avoid
When installing fiberglass batt insulation, it’s crucial to avoid common pitfalls that can compromise its effectiveness:
1. Ignoring Safety Gear
As mentioned, not wearing the right safety gear can lead to irritation or injury. Always prioritize your safety when handling insulation materials.
2. Incorrect Cutting
Ensure your cuts are accurate. Batt insulation that is too short will not provide adequate insulation, while pieces that are too long may not fit properly.
3. Neglecting Vapor Barriers
In areas where moisture is a concern, failing to install a vapor barrier can lead to problems like mold and mildew.
4. Overstuffing Insulation
While it’s important to have a snug fit, overstuffing insulation can lead to compressed fibers. This compression reduces its insulating properties.
Conclusion
Installing fiberglass batt insulation properly can significantly improve the energy efficiency and comfort of your home. By following these guidelines, homeowners in Medford, OR, can effectively enhance their insulation systems and enjoy the benefits for years to come.
For those in the surrounding areas of Ashland, Central Point, Eagle Point, Grants Pass, and Roseburg, remember that professional help is available. If you’re looking for expert assistance with your insulation projects, don’t hesitate to reach out to All Foam & Insulation, LLC, at (541) 402-2500.
FAQs
1. Can I install fiberglass batt insulation myself?
Yes, fiberglass batt insulation is designed for easy installation and can be done by most homeowners with basic tools and safety equipment.
2. What is the R-value of fiberglass batt insulation?
The R-value can vary based on the thickness of the batt. Common R-values range from R-11 to R-38.
3. Is a vapor barrier always necessary?
Not always. Whether you need a vapor barrier depends on your local climate and building codes. It’s best to consult local guidelines.
4. How long does fiberglass batt insulation last?
Fiberglass batt insulation can last 20 to 30 years if properly installed and maintained.
5. Can I add insulation over existing insulation?
Yes, you can add fiberglass batt insulation over existing insulation, but ensure the top layer is properly secured and that there are no moisture issues.